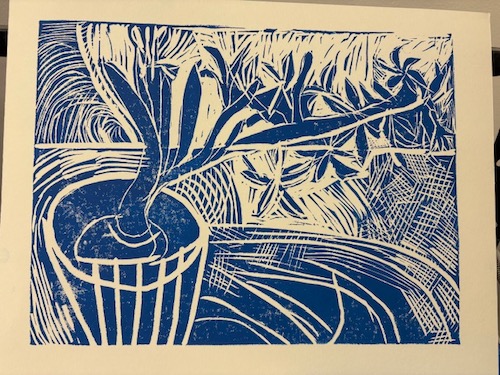
Linocut by a student from Kate's Linocut Printmaking Course
by Kate Lanxner, The HeARTful Blog
Welcome to HeARTful Blog. We have a second part here, to add to the first installment Linocut Printmaking blog, that will give you, our art-loving readers, practical hands-on details.
Step 1: What is the process for creating a linocut (blockprint)?
In my own experience, it is the “learning by doing” that brings any artist to the next level. It’s true, whether you are a beginner or just getting re-acquainted with the medium. Upon joining a class or workshop, or setting up your own studio space, with the materials listed below, you would be all set.
Blockprinting ink is available in jars or tubes, and it is much more water-soluble than acrylic paint. My advice is not to try to use acrylic paint in blockprinting. Problematic! It can ruin a brayer: the hand-roller that is used in the process.
Teaming up at a workshop or class with a like-minded friend is a good way to go. This is what we do in my classes. There is much to be gained from sharing technique ideas, showing your work to others and having a camaraderie.
Remember, all your effort will be worth it, once you have your design printed for the first time (called a “proof”), you can make multiples!
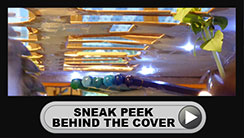
What follows are two photo essays I have found to be the best visual pieces online of blockprints. The first is from a Paris studio school called Apolline, which also offers workshops. There are 7 photos to help you follow and a short video (no audio) of about 1 minute. If you have plans to visit Paris in the near future, you might see if they have a weekend workshop! It appears this one was about printing on a canvas tote bag.
Here is another printmaker to follow: Daniel Villa, if you have Instagram: @danielvillaart. He is a self-taught, and he has a very good photo essay on the steps in making a print. Sometimes his cat gets into the act as well. Look for the initial photo of his hands holding three carvers against a green background. You also might come across a stunning print he did from Yosemite National Park in the western U.S.
Step 2: To choose a linocut block and decide on what size
There are new materials for the blocks, and also the traditional linoleum available in Switzerland, to choose from. More details to come in the Materials section farther down.
If you are a beginner, I recommend a block of about 10cm x 15cm, which would be the perfect size for a greeting card. If cards are your thing, check the sizes in a papeterie, and check with the Poste on what will travel without extra postage. You can find blank card sets often at Migros or Coop, but make sure the paper is not too thin.
If you are using the pressing-by-hand method, and are not a beginner, 30cm square would be okay. Otherwise the ink might dry too much in the process. If you have a lino press, you would just have to stay within the dimensions of the press “bed.”
Step 3: Sketching out a design
I would recommend something decorative to start you off. If you need inspiration, do a few practice drawings on paper from existing folk art designs,for example. There are plenty on Pinterest.com. You might find a paperback as a resource, in Dover Editions. Another good source are the prints by the artists of Cape Dorset, in northern Canada, the Inuits. I have structured whole drawing lessons inspired by these animal prints; the essence of the animal,or fish, is described in simple shapes.
Remember when you draw, your design will be reversed on the print. So grab a sheet of tracing paper and do an ink tracing of your pencil sketch, then flip it, to work from it. There are other techniques that any print course will explain to you. Remember this especially if you plan to have any lettering in your design!
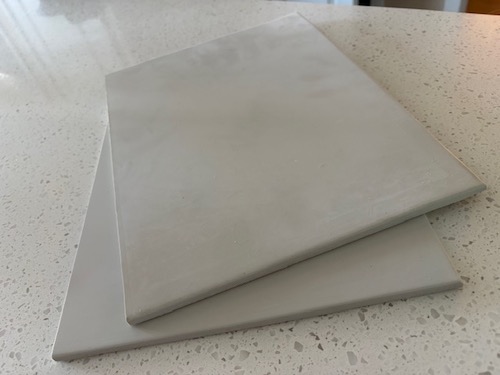
Linocut "SoftKut" blocks available on www.dickblick.com
Step 4: Materials you will need
Several of these may be able to be purchased as a set from the larger art supply stores. Please look over their sites which I have listed below, or phone them,as I was unable to confirm each one of them has linocut supplies.
- 1-2 brayers (rollers)
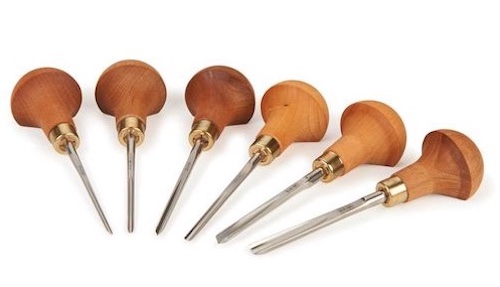
- at least 2 carving tools of different sizes (or nibs on an exchangeable holder)
- water-soluble blockprint ink such as Schmincke Aqua or Pebeo LINO and contains fluorescent and metallics as well
- good quality drawing or printmaking paper
- carving block. I recommend a new material we are using here in the States called SoftKut from Blick Art Materials, which is much easier and safer than linoleum (image above). I have also learned of a material for blocks you can order from a Swiss online store: Daler-Rowney Adigraf which is also inexpensive.
- You will also need a clear sheet of Plexiglas or Lucite (at least 5cm larger on each side than your block), for rolling out your ink. If you can’t find one, a cookie sheet would work.
Most importantly, you will need a basic utility sink or a laundry sink since you will be cleaning your brayers (ink rollers) and blocks there. Soap and water works for this but it is better to have a separate sink if possible than the one in your kitchen or bathroom.
Linocut terms in French
- General name for blockprinting: Gravure l’impression en relief
- Cutting /carving tools: Gouge à lino. Most popular is the Pfeil brand (pictured below) or Speedball.
- Brayer: Rouleau en caoutchouc
- Carving block: Plaque de linoleum
Where to buy:
Gerstaecker.ch: An online store with a huge selection, Switzerland (no physical store). Confirmed to have Linocut supplies!
Boesner.ch: Zurich, Berlin, Vienna
Kramer-Krieg: Rue Centrale, Lausanne
Blick Art Materials: in the U.S., ships to Europe, confirmed to have linocutting supplies online.
Step 5: Carve your block
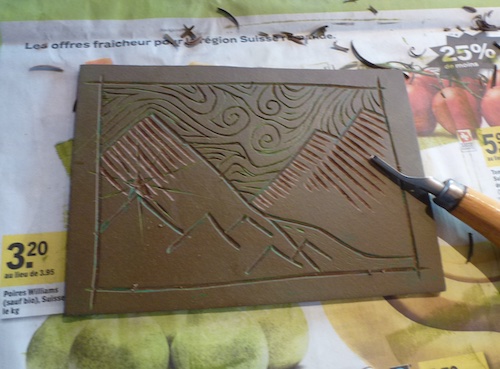 Some artists like to take very fine sandpaper so the block will “hold” the ink better (optional). Another optional preparation would be to brush on a thin layer of black India ink or a dark watercolor coat, so as you are working, you can better see what you are carving out. You would clean that off with water before you print.
Carve the main lines; don’t try for details yet.
Maarit Hanninen, who is Finnish but works in Amsterdam, has demonstrated her carving on several videos, viewable on her site. Whatever you carve out will be the negative space on your finished print. In other words, it will appear as the color of your paper. Here are good videos on YouTube and Instagram.
In the first one, you can see at the end she uses an X-acto knife cutting around the perimeter of the block, to make her image a different shape than a rectangle. You might try this, further down the road. You can see examples of her decorative (but very complex) work on her website. She has some extra steps in her process; we don’t have the space here to explain in depth but these books can give you advice:
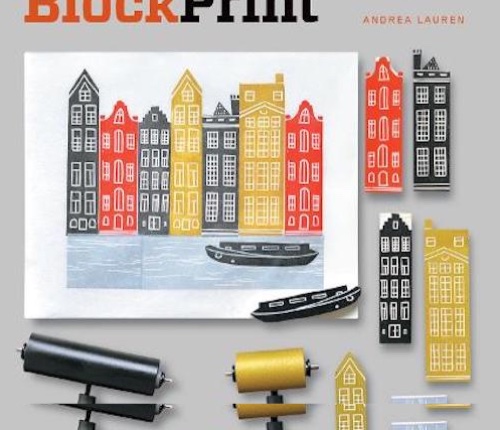
- Blockprint by Andrea Lauren
- Blockprint Magic by Emily Howard
- Inky Dog Studio by Jane Spink
Step 6: Finish carving your design details
Some carvers have interchangeable nibs. Some nibs look like a “V” for line work. Others are more of a scoop shape, to remove larger areas.
Step 7: Pick your ink color
First, squeeze a thin ribbon across the top of your sheet of plexiglas. The sheet should be a couple centimeters bigger than your block. Pick up a clean brayer (roller). Gradually move the brayer up and down until you have a level patch of your color without lines or thick patches.
First, squeeze a thin ribbon across the top of your sheet of plexiglas. The sheet should be a couple centimeters bigger than your block. Pick up a clean brayer (roller). Gradually move the brayer up and down until you have a level patch of your color without lines or thick patches.
Step 8: Use the fully-inked brayer to ink your lino block
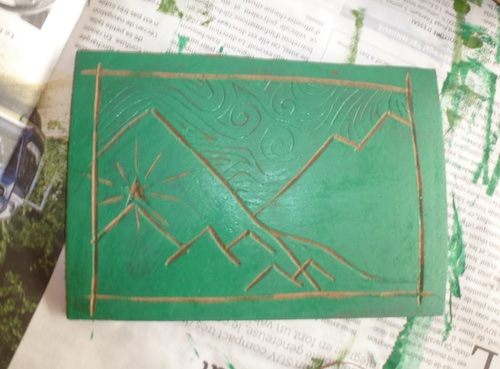 What works best is to place the block on a piece of clean cardboard or another plexiglas sheet. With experience you will learn how much ink is enough, or too much.
Step 9: Print a “proof”
Select your paper. It should measure 5cm more on each side than your block. The paper should be good quality with a percentage of cotton called “rag paper” (not printer paper) but not too thick. Your block will be face up; place your paper on top.
By hand: Press your hands along the back of the paper in different directions; you can also use a wooden spoon, or, a dry brayer. If you have a linocut press, this is the professional way.
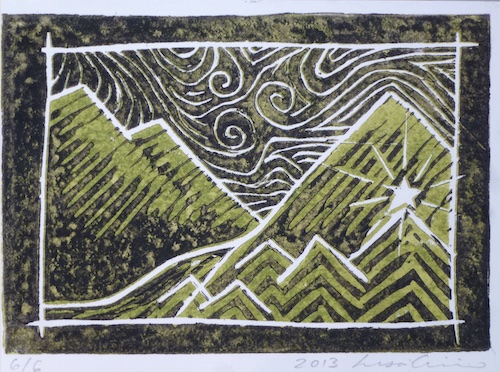 Next, lift the paper up slowly from one corner. Voila! You have a blockprint!. After the proof, you should clean the block on a flat counter or table, with a wet soft cloth or paper towel and dab it dry. Best not to hold it under water, or scrub it. You might want to correct a few things that you find on the proof.
Once your block is dry you can do this (Maarit shows this on the video I shared above).
Drying: Blockprint ink takes about 3 days to fully dry. Otherwise it sticks, so find a place where your prints don’t touch with each other on a counter, rack or make a type of clothesline arrangement.
Step 10: Print multiples and have fun!
Experiment with different paper and ink color combinations. Learn how to do a rainbow roll from an instructor, if you can.
Safety First!
Since the carvers are sharp, if you don’t wear glasses, try a pair of plastic safety goggles. Carve on a mat that won’t slip, like the standard green “self-healing” mats.
Reference websites
Those by contemporary linocut artists in addition to Maarit Hanninen and Daniel Villa, who I already mentioned, talking or writing about their work, their process, and how they got started.
- James Green: James may have been the first linocut artist to reach the semi-finals in the popular British Sky Arts series “Landscape Artist of the Year”.
- Iain McIntosh (Scotland): A prolific illustrator who combines handcut lino art with computer art, for the novels of Alexander McCall Smith, such as the 44 Scotland Street series.
- Gareth Barnes: a New Zealander living in the U.K. has many interesting parts to his website and has examples of his work.
Read part 1 of this article at this link.
If you happen to receive this newsletter and live in the region of Washington, D.C./Montgomery County, Maryland, Kate is available to offer linocut classes and workshops for your school or organization. Please email her for details.
Author's bio
 Kate Lanxner
An American and former Geneva resident, an art teacher for more than 25 years, and a published illustrator. She currently teaches in Montgomery County, Maryland, outside of Washington D.C. in the U.S.
After graduating from art school, she traveled to Paris and took part in a printmaking program at Atelier Contrepoint (formerly Atelier 17) in color etching and engraving, directed by the late Stanley William Hayter. She has not only taken to making art, but sharing her knowledge through The HeARTful Blog.